Wednesday, January 25, 2012

Why I Love Bentos & Seedlings

This year I have made the girls bento lunches everyday for school.  There's many reasons I love these lunches.  They're so practical.  Ha!  You're most likely saying..."Those are the most impractical lunches with all the forming and decor...and they must take hours to make."  Nope, not really.  I haven't had so much fun fixing lunches in my life.  I used to hate making lunches and I would get lazy and skip.  Then my girls had to get lunch in the cafeteria, and we know what those taste like.

When I was in high school I would take my lunch money everyday and buy a candy bar, a bag of chips and
a coke.  Wonder what my Mom would have thought if she only knew.  My girls love these lunches, and I know.  Each day they let me know exactly what they liked and sometimes didn't.  Mostly I get rave reviews from my girls in the bento dept.

The Things I Like About Bento:

They are fun to make and eat
It's easier to include healthful choices that your children will eat
The containers moderate portion sizes
and there is absolutely zero trash to throw a way

Here is a couple of bentos I made the girls recently. 

Baby boiled egg wrapped in a pink soy "lacy blanket" with flowers.  The oranges are from my trees.  The carrots are from the garden and the eggs are from my chickens.
 
AAAwwwww!  I used a paper punch to make the lace on the soy blanket.
It's really easy to decorate it up.  The carrots cut in two ways make a nice sun on fried rice.
Fried Rice Recipe

Cooked rice 2 to 3 cups
Sesame oil 2 tblsps
chopped onions 1/4 cup chopped fine
Thai garlic chili paste 1/2 teaspoon
Chopped green onions 2 or 3 stalks
soy sauce 2 tblsps
2 to 3 eggs
salt to taste
pepper to taste
bean sprouts

Put everything but rice, bean sprouts and eggs in wok or skillet.  Not sure on portions.  I just use the amount I like of each seasoning.  Saute until onions are clear.  Add rice and stir until completely covered.  Once rice heats up push to sides of pan.  Crack eggs in pan.  Gently scramble until done then mix rice and eggs together.  Sprinkle salt pepper and sprouts on top and serve.  Of course you can make numerous variations.

Picks are an easy way to brighten up the bento.  They make my girls smile.  It's King Cake time in New Orleans and Ponchatoula Strawberry time.  Mmmmm these strawberries were sweeter than Louisiana strawberries typically are.
They stack up nicely and are held together with a felt or elastic band.  When the girls finish their lunch they put their box in their book bags and bring them home to be washed.  I include chopsticks, spoons or forks when needed.  I just slide them under the strap.  Absolutely ZERO Waste. 

That's important to me.  My girls' schools actually serve lunches on disposable Styrofoam trays, plastic utensils, paper napkins, and cardboard cartons...Seleste says that each child has a small mountain of trash on their disposable tray to throw a way each day! 

That's just our little community....3,000 little mountains of trash EVERY DAY.  DOES THIS MAKE SENSE TO ANYONE?????!!!  I was told that they didn't have the finances to hire someone to run the machines to wash the trays.  THEY HAVE TRAYS AND A MACHINE AND DON'T USE THEM!  THIS IS SINFUL!  anyway...it really doesn't make sense to me.  Even if you have no prob with the trash....wouldn't you rather use the money to pay someone to have an actual job in the community rather than send it off to purchase landfill fodder?
My seeds are sprouting!  I used a micro soil blocker tool to plant the seeds.  I will move them into larger squares once they develop some roots.
Lookin' good
You'll be in the ground before you know it!

Monday, January 23, 2012

The Sauerkraut is Finished & my Wonder Mill Junior

It's been a long time since I shredded, salted and stored two cabbages in my new crock...now we get to see if there's anything edible inside!!!!

First I soaked up all the water from the rim...
...pulled the lid off and hmmm...smells like sauerkraut...whether that's good or bad depends on the person....the liquid is clear...no yucky smells, scum, or color....so I pulled the weighting stones off and the large cabbage leaf beneath....and....
...yummy sauerkraut...It's very different from the sauerkraut I have bought in the jar.  The jar type is vinegary and soft.  I suppose that is because it must be heated to can.  This fresh kraut is very crispy, no sliminess at all and slightly tart and vinegary.  Talia gobbled up a fresh bowl full in no time.  Fresh kraut is supposed to be extremely good for you and loaded with little living things that are good for your digestive system...hmmm....we will see.
..the two large cabbages made a total of 5 quarts.  I put some in a pint jar to give to my mother to try.  I really shoved the jars full.   Success!!!!!!

One of my other Christmas gifts was a hand cranked stone grain mill.  This mill is called the "Wonder Mill Junior Deluxe".  It came with stone and steel burs.  The stone is for grains and the steel is for oily things such as peanuts.  Yes it makes peanut butter!

Tera and Byron helped me mill enough hard red organic wheat berries to make one loaf of bread.  Eeeks...I needed Byron and Tera's help.  I'm sure we'd eat less bread if I had to do this daily.  We'd probably have no need to watch our weight either!  My abs would be as rock hard as Brennen's (That's my nephew...I'm scoring brownie points.")   Whoa those women back in the day worked hard....It's no wonder they'd rather haul their grains to the local mill! 

I am excited about having this though.  We can mill grains if we'd like and my girls think it's great fun!  I think...it's great that they can have fun while learning a whole boatload of useful things.  Tera insisted on milling most of it.  She smiled the whole time.  I wonder how long it would last if I woke her up each day to this chore.

Speaking of Tera,  she is such a sweet (most of the time) practical sensible girl  Her name Tera (meaning earth) is so appropriate for her.  Her feet are really grounded.  I'm very proud of her desire to be independent and her fearlessness in learning new skills.  Saturday I awoke to her rattling around in the kitchen.   She had unloaded the dishwasher and was making breakfast.  All on her own she made skillet fried potatoes and onions, fried eggs and biscuits.  We ate the biscuits with some pure cane syrup my Mother bought for me recently from her hometown, Jayess, MS.  Yep...pronounced - J - S.  When I was young I spelled it that way!
(look at my micro seed blocks all planted in the back)

On another note.  My carrots are just fabulous this year!!!!!  Sweet crunchy and yum!

Wednesday, January 18, 2012

How To Make a $3 Rocket Stove

Hee Hee,  This is so much fun.  I love projects such as this.  You get to play with fire outside.  Really we tried this project out to see if maybe it would work as a simple stove we could use when we camp on/visit our property in Mississippi.

It works really well too!  The water was boiling in very little time once Byron figured out the trick to working it.  The materials cost about $3.00 at Home Depot (you might even find these materials lying around your place) and it took Byron all of a few minutes to make it. 

The materials needed are:

1 cinder block
1 1/2 cinder block
small flat brick
three stones (to act as trivet on top, I plan to find a discarded trivet from an old stove to use instead)

Then:  Knock out 2/3 of the divider in the whole cinder block using a hammer and chisel.  Stack the 1/2 block on top.  Next put the small flat brick on the front 1/2 of the open side of the whole cinder block. 

The trick to working the stove effectively is to collect small twigs and sticks to use as fuel.  Once Byron started putting in large pieces the whole stove went out.  Small sticks and twigs work best.  You start a small fire under the "chimney" then add small twigs through the opening to build the fire and keep it going.

Recently we put our gate up on our property.  Next we plan to spend lots of time observing and taking notes in order to decide where best to install swales and ponds.  I want to do it right the first time.  Also it will save time and money when we have to bring in large equipment to move earth. 

Since we will be spending time there without a cabin or house...we'll camp!  Which suits me just fine.  I adore sleeping outside.  So these rocket stoves will come in handy as a free and easy way to cook.  There is abundant wood on the property and finding fuel for the stove is as easy as picking up the sticks that are already lying around.  I'm also thinking that...this may be a good way to cook during the summer right here!  Save on A/C bills maybe!

Wednesday, January 11, 2012

Gardening in The New Orleans Area and Lemons

Again, two topics - one blog post. 

I receive lots of questions about gardening in our zone and unique environment.  Gardening is very different here than most of the United States.  We have very few freezes and can grow all year long.  Generic gardening books aren't that helpful.  So I am going to do a series on gardening in zone 9a (although I think some of my micro climates are a little warmer than this). 

Each land area is very unique and affected by bodies of water, mountains,  forests, etc...so it's very important to know your zone and try something new and different even if it may not be recommended.  Go HERE to find out your zone.  Talking to other gardeners and visiting gardens in your area is soooo important.  I often visit our local botanical garden and take notes on what I like and what's blooming or fruiting at that time.  Journals are invaluable.  That's one reason I started this blog.

Also, my eyes are always checking out what's growing in the yards as I travel through different areas of town.   I love to see what's growing in the community gardens of Bywater and at times the crape myrtles carpet the streets with hot pink blossoms and large clumps of banana trees hang heavy with their large purple blossoms and tiny growing green bananas.  The formal gardens of the garden district landscapes specialize in the contrast of color and form to accent their historic grand homes.  The Chinese fringe trees framing the wedding cake house are magnificent.  So spy on your neighbors.  It'll help you know when to plant.

Most of all....don't be discouraged by failure.  Use your failure as a learning tool.  Wear failure like a badge.  Because it means you weren't afraid!  But soon your successes will far outweigh your failures.

January Garden Notes:

Plant seeds for spring transplants (tomatoes, eggplant, peppers and herbs)
Prepare beds for spring planting by removing dead and finished plants (compost them)
Apply organic fertilizer to beds
Keep winter weeds at bay (do not allow to seed)
Plant any quick growing winter crops such as lettuce, radish, beets and greens (feel free to push the envelope with other types of crops if you wish)
Begin to keep a garden journal (include photos, and seasonal notes as well as dreams and wishes)

Personal January Garden Details and Plans:

Currently in the garden:  A recent frost nipped the tropicals so they are tinged with brown.  I am weeding the raised beds and putting cardboard down on the paths to prepare for spring mulching.  I'm going to remove the dead bean vines and other plants that are ready to go and prepare those beds for planting by heaping compost and chicken manure on top.

I am going to try planting a late winter crop of lettuce and beets.  I always plan to faithfully plant lettuce every few weeks during the winter to keep a steady flow of ready lettuce, but I've been a bit lazy in that matter.  I'll plant a little now and a couple of weeks later I'll plant more and etc...until about the end of February.  Once temperatures reach 80 degrees the lettuce will taste bitter.  I do allow my lettuce to go to seed and collect the seed.

I also am preparing for spring planting.  I am planting tomato, pepper and eggplant seeds inside.  That way the transplants will be nice and large  by March.  I will plant them outside mid-March.  The tomato varieties I chose are Brandy Wine Pink, Pineapple (my fav),  Cherokee purple, Cour di Bue, and some seeds I received at a seed exchange:  Australian Heart and Amazon Chocolate.  Eggplant varieties are Cambodian Green and Fengyuan Purple.  My fav eggplants are the long thin purple Asian varieties.  I just like the flavor best.  I went a little wild on the peppers but I'm planting:  Cayenne, Thai long sweet, India Jwala, Spanish Mammoth, Tampiqueno, Anaheim, Texas Bird Pepper, and Fish Pepper Whew....

I plan to plant the corn near the end of February and keep my fingers crossed.  The corn does so much better when I get it in the ground early.  Virtually no pests.  This year I chose two non GMO varieties:  Cherokee White Eagle, Golden Bantam and some Red Flint corn I got at a seed exchange.

The large row garden is weeded and I plan to lift the plastic and add chicken manure and compost.  I am trying to keep this garden going without any tilling by using plastic mulch to keep the weeds at bay and each spring and fall I plan to add compost, mulch and manure to raise the rows and fertilize.  I'll let you know how my no till method is working for me.

Soon I will do a post on my complete planting schedule.

Pics of some of my seeds I am planting now.
A few of the companies I bought seeds from.  I also love seed exchanges.  You prepare little packets of seeds you grew and bring them labeled with the date (not everyone does this but I do as a convenience for others).  Bring empty envelopes and a pen for labeling for yourself.  Then exchange with those there to your hearts content!

Lemon crop is bountiful!  So I gotta save 'em.  The freezer in ice cube trays is easiest for me.  I then make what I want with the juice throughout the year.  I do believe I am going to look into canning the juice...you know those hurricanes and power outages aren't nice to the stuff in the freezer.

Look to the right...see what's laying again!  The chickens are laying again!

Cut in quarters, peel and juice!
Freeze in trays...
Save....
...and make lemon curd, lemon bars, lemonade, lemon yogurt....and Lemon Sour Cream Pound Cake!  Possibilities...endless!

Sunday, January 1, 2012

Living South of Lake Pontchartrain and How To Make Sauerkraut

Okay, two posts in one.  I'll start with the first.  I live "south of the lake".  Really, south of New Orleans.  Lake Pontchartrain is a fairly large lake north of New Orleans that is spanned by the world's longest continuous bridge over water.  The bridge is called the "Causeway", and I spent many an anxious night as a very young girl peering at the tail lights of the car in front of us as we traveled home on this bridge from some late night Bible Conference that my Pastor Father loved to attend.

My secret childish fear was that a concrete span surely one day would break and simply fall into the lake, and all the unsuspecting drivers would like lemmings fall over it's cement edge.  I wonder if my Father ever knew his tired little girl struggled to keep her eye lids open on those long late nights.   For surely my alertness would save the whole family from plunging into lake Pontchartrain and sending all our souls to a horrible watery grave.  My plan was to scream loudly  if the preceding car's tail lights suddenly disappeared thus causing my Father to slam the brakes and save us from an early demise.

Now, I love to cross the causeway.   There's always a sailboat or someone trawling.  The water shimmers and glistens and on a really windy day there are white caps.  But, once you get south of Lake Pontchartrain.....climate wise....things change.  Slightly milder weather allows citrus to be planted in the ground, and unless a once in 25 year freeze happens, your trees grow larger and more productive each year.

Today I was marveling at the abundance I find in my garden.  It's no wonder that the city is called "The Big Easy".  So much of living here is so easy.  The abundance, the food, the exuberance, the special brand of Jazz, the closeness of families.....many things.  I've looked at blogs from way north and marveled at the blankets of frost and snow that cover their landscapes.  Like squirrels people work at preserving the bounty of their garden for winter consumption.

I too love to can.  I canned green beans, carrots, pickled cauliflower, preserves and fruit of all types.  I dry produce and freeze it....but sometimes it seems as if I rarely use these wonderful put ups.  Fresh fruit and veggies from the garden always come first when planning my menu for the next few days.  And, they always are available!  Of course I want to feed my family the freshest foods first.  

Such as beets boiled until tender and sprinkled with salt, pepper and balsamic vinegar, coleslaw made from a fresh picked cabbage, salsa from the green onions, tomatoes, jalapenos, cilantro, garlic, lemon, lime, and onion (yes, I'm still picking them), cauliflower omelets, yummy tennis ball lettuce salad, greens and cornbread, sugared pecans, roasted carrots with deer roast, boiled turnips and butter....wow the list really goes on and on.....

With the winter abundance our local climate gives I rarely find a reason to use the canned items I have hoarded on the top my large dish cabinet (not really a china cabinet).  I find preserving berries is the most useful of all since they are so perishable.  Jams, butters, and frozen (especially frozen blueberries).  Dehydrating herbs is really nice too.  Especially garlic and parsley.  I'd rather use herbs fresh if possible.  yet sweet basil is too tender for even our mild climate.  But the other things I've canned....useful?....not so much.  I'm actually trying to work them in to keep them from being on top of the cabinet for too long. 

So what's a girl to do?  What's the best thing to do.  I think I've narrowed down the best things for preserving and storing in our climate.   The rest.....you can pretty much get local or grow yourself all year.  Here goes:

The List of The Best Things To Preserve, Freeze or Dehydrate if You Live in or Around New Orleans:

Canned tomatoes
jams
jellies
fruit butters
sauces
dilly beans
frozen purple hull peas
frozen Lima beans
frozen baby green beans
frozen corn
frozen blueberries
dried basil
dried parsley
dried mushrooms
dried garlic (a small creole variety I have keeps fresh pretty well)
homegrown popcorn
dried onion

That's all...I think.  What is available fresh in the yard right now is too numerous to completely list.  Some examples are:  All types of greens, carrots, lettuces, herbs, cabbage, broccoli, Romanesque, cauliflower, green onion, tomatoes, jalapenos, kale, collards, turnips, beets, onion, winged bean, arugula, oranges, lemons, grapefruit, satsumas, pecans.  So.......... fresh it is for the "Big Easy"!

Some pecans recently shelled.
Sample of what's up in the gardens......
Now on to the second post:  How To Make Sauerkraut

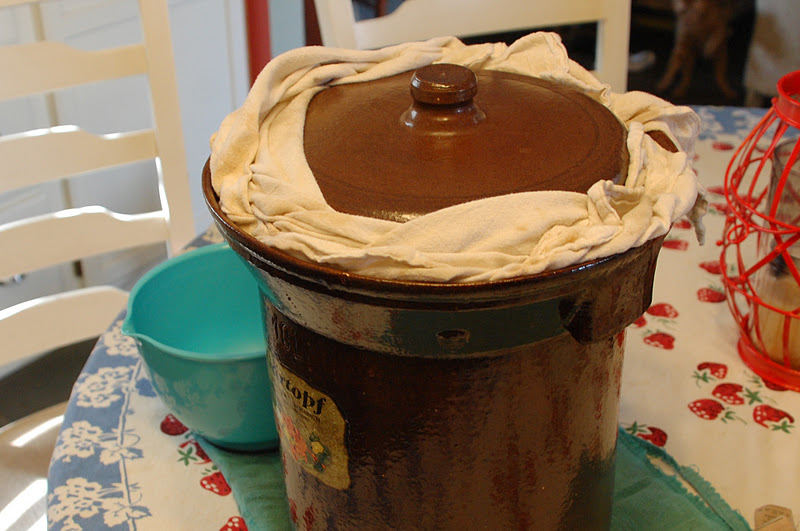
When I was growing up sauerkraut was for hot dogs and Rueben sandwiches...yum.  My husband family eats it cooked as a side to go with sausages and paneed, breaded and fried pork.  They love it, and they are certainly not German.  Growing so much cabbage has made me interested in trying my hand at making sauerkraut....So, Byron, finding this out, bought me a really awesome 10 liter Harsch fermenting crock.  Yea!!


So, let the experiment begin.  Wow, look at that opening.  How does this work?
First, thinly shred the fresh cabbage.
Oh, by the way, here are all the pieces to the crock, the crock itself, the weighting stone, and the lid.
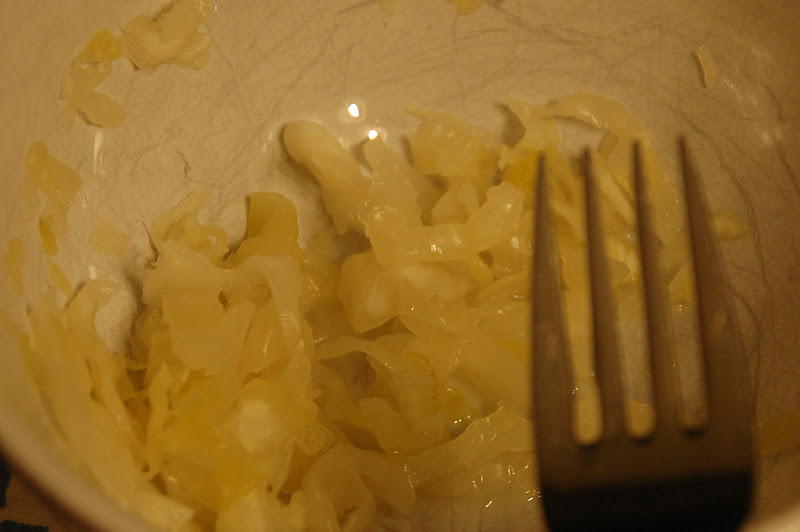
After shredding the cabbage, sprinkle a little salt on layers of cabbage.  A few tablespoons will do.  After sprinkling the salt, mix thoroughly while crushing the cabbage.  Exert lots of pressure, this helps the cabbage release it's juices and create it's own brine.  If the cabbage doesn't release enough water you can make a brine by boiling water and adding salt.

Once done with the above step, put the cabbage and it's brine into the clean crock.  Put a fresh washed large cabbage leaf on top and then the stone to weigh down the mixture underneath the brine. The brine should cover the cabbage nicely.
Next put on the lid and fill the moat surrounding the lid with water.  As the mixture sits, check and make sure the water in the moat doesn't evaporate.  Add more if needed.  See the little mouse hole in the lid (that's what I call it)  The water level should cover that.  It will allow gasses to escape, but keep the mixture sealed.

Then......Wait....six weeks.....I'll let you know how it turns out.  Keep your fingers crossed for good results!