Thursday, January 24, 2013

Around The House and Gardens

Everything looks a little drab this time of year.   But it's a time for planting and doing.  A random sunny day has been sneaking in and the clover starting to pop up.  There's also the unmistakable scent of citrus blossoms on the wind....so some trees are most certainly blooming.  Guess that means I'll have to clean up the remaining fruit on the trees and trim them! 

 The bees are loving the blooming Asian Mustard.  The broccoli heads have been picked, but I am still harvesting plenty of side sprouts.  Enough for salads and dipping.

 My new green house I got for Christmas.  It's small, but I believe it's going to be perfect for starting my seedlings.  That's really all I need it for.  I'd like to change the covering to shade cloth in the summer.  I think I'll have to make that myself....and I'm not so sure how to tackle that...will see.
The seedlings are popping up.  If you are going to start your own seeds in the New Orleans area....do it now...yesterday would have been better.  Seeds to start early are:  tomato, eggplants and peppers.  Large seeds such as beans, corn, squash, melon, cucumber, okra,  etc....are best planted directly in the garden...and it will be time to plant those very very soon.  Prepare your beds and get your seeds ready.

Tomato popping up.
Thai Basil.
Here's the bench Byron made.  Look at my nice deck flooring Byron built to put the green house on!  Luv it.
Cabbages are just gorgeous!  Beautiful.  I think cabbages are lovely!
I've been collecting cardboard boxes and putting them on the paths.  Getting ready for the mulch!
Broccoflower....taste like cauliflower.  Lovely color.
Herb wheel.  Green onions, coriander, parsley, dill, rosemary, and natursium.
Lettuce!
Today's harvest.
 Some more of today's harvest....a wagon load of cabbage!
Ready for sauerkraut, coleslaw, cooking and pickling!
Wanted to mention....MY BANANAS ARE FRUITING!!!!!!!! Amazed!  They're only what, two years old?  I'm excited is an understatement.
Get ready for the season by:

Preparing beds (don't forget you can grow bush and compact varieties in pots!)

Ordering seeds
Baker's Creek Heirloom Seeds  This is a good source.

Planting in pots:  tomatoes, peppers, herbs, artichokes, and eggplant (there may be others you want to plant)
Mother Earth "Starting Seeds Indoors"
 

Monday, January 14, 2013

Christmas Tea Party

This year I decided to give a Christmas Tea Party for the ladies in my family and my Father of course! He was the guest of honor!  What a blast we had!  I started early.  I wanted it to be the best tea party ever...So....I made everything that I could myself.  Even the smoked salmon!  (With help from Byron!)  I promised everyone I would post all the recipes (at the end of this post) and some pictures.  Hope you enjoy.  Maybe you'll be inspired to have one yourself next year, or maybe this spring?

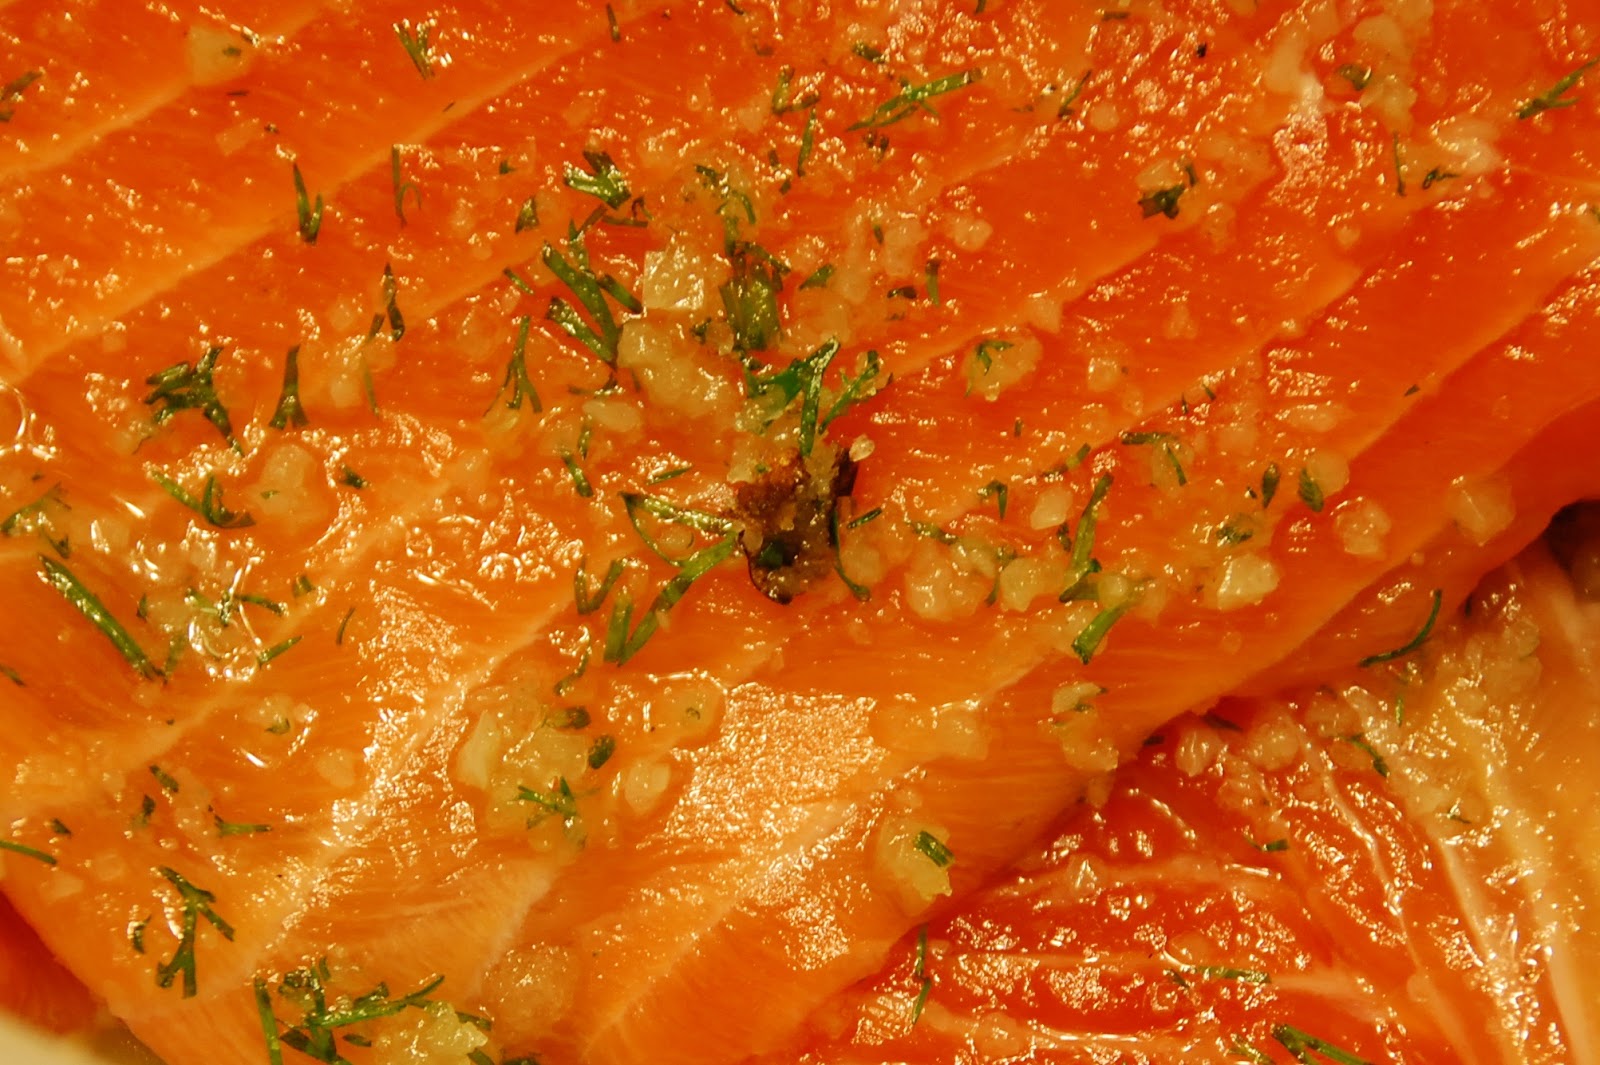
Here is the salmon covered in fresh dill (which there is plenty in the garden), juniper berries, sugar and sea salt.
I found these little baking cups.  They're adorable and really neat.  They stand up on their own and bake just like that...I like.
These are the holiday ones.  I also bought butterflies and cloud ones Spring?
Bambi is Byron's!  It's from one of his trips to Disney World as a child.  The little velvet deer is an old ornament of my Mother-In-Law's.  Prehaps from the 50's?  I didn't buy any decorations.  I love using what I have on hand in a different way to decorate and surprise people.
These are my shoes....Grand enough for the party I believe.

The coffee table set with Lemon Sour Cream Pound Cake, Strawberry Shortcakes, Peanut Butter Balls, Salmon Bites, and Roast Beef and Cucumber sandwiches.
Tiny Strawberry Shortcakes
 These Asparagus Sandwiches were the favorite and every single one was devoured.
The kitchen table with veggies, praline brie, date balls and sandwiches.  The floral arrangement was made from what I could find in the garden that was still presentable.  Flowers, pods and unique greenery!
Date scones with cream and lemon curd...the best!
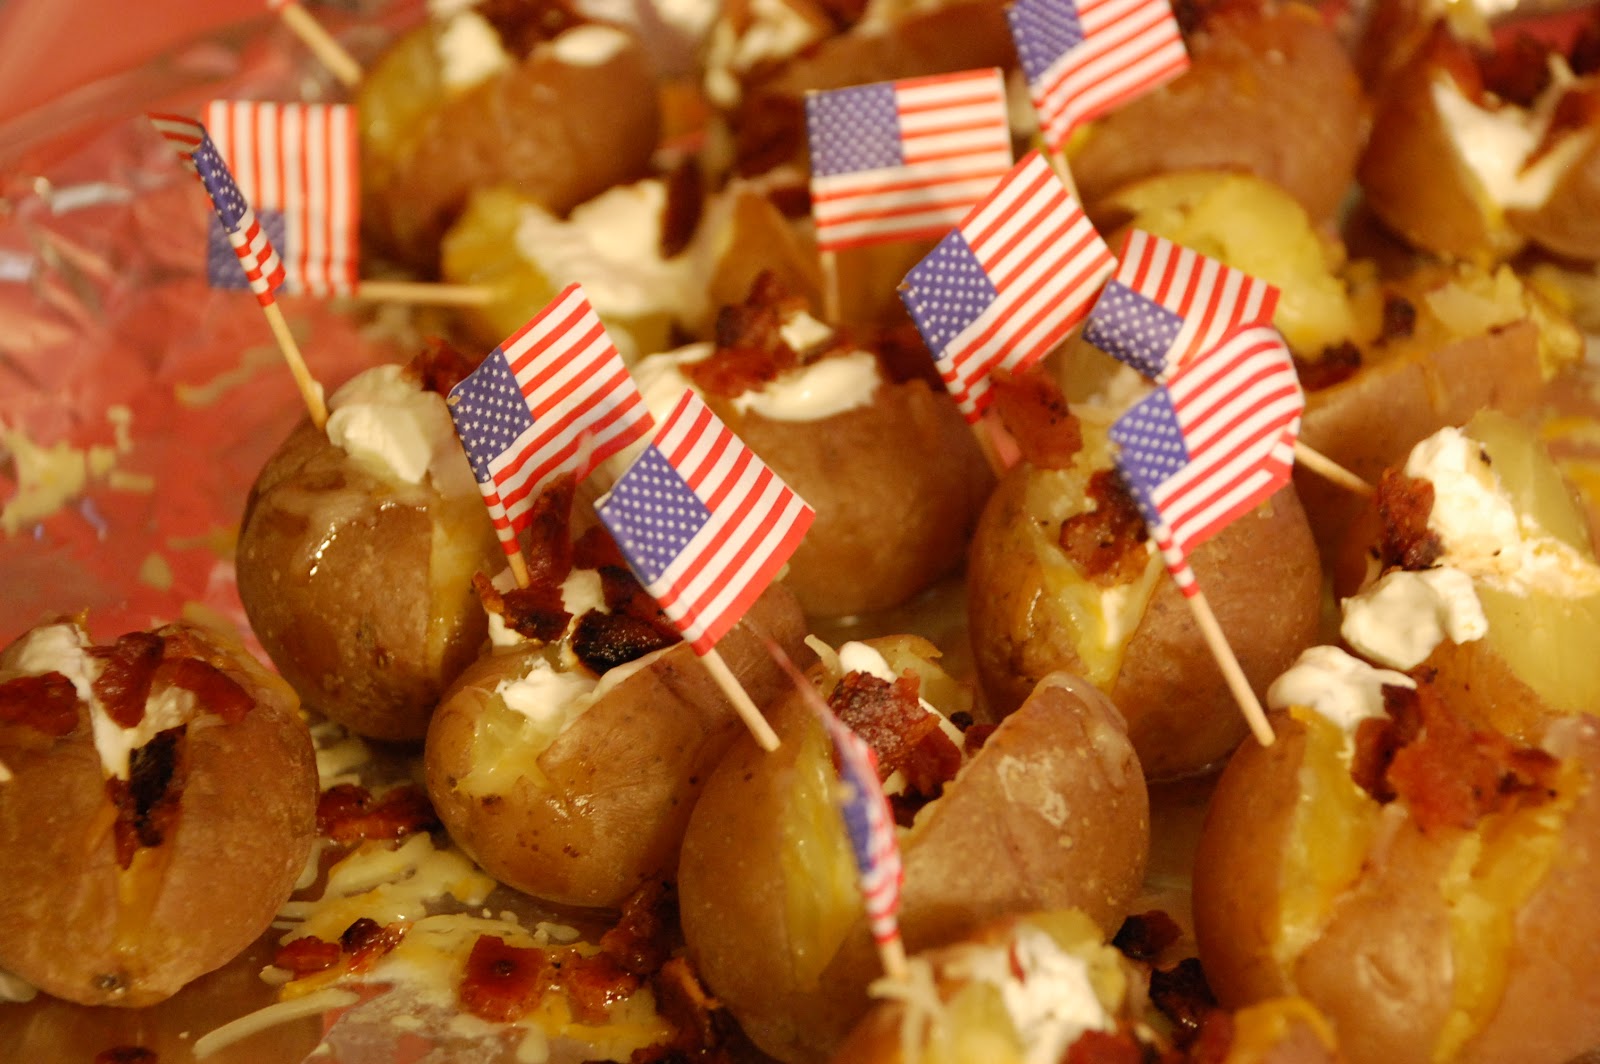
Tiny stuffed potatoes with a patriotic tribute.
Veggies all from the garden! 
 

Salmon Bites
 
Pumpernickel Bread
Smoked Salmon
Cream Cheese
Small Amount of Milk
Chopped Fresh Dill
 
Cut pumpernickel bread into small circles using a small cookie cutter (silver dollar size).  Mix cream cheese with a small amount of milk to make it a little softer.  Put cream cheese into cake decorating bag with a large tip (I use a really large tip.  The kind used for icing cupcakes).  Squeeze a flower of cream cheese onto each pumpernickel round.  Top with a few flakes of smoked salmon and sprinkle with fresh chopped dill.
 
I make my own smoked salmon.  I'll put that recipe in another post.  I like my own best!


Asparagus Sandwiches

White Bread
Mayonnaise
Fresh Asparagus Spears
Salt
Pepper
Lemon Juice
 
Cut tough ends off of asparagus.  Steam Asparagus.  Asparagus should still be on the crunchy side.  Cut crust off of bread and spread mayonnaise on one side.  Lay one steamed asparagus spear on slice of white bread mayo side up (of course).  Sprinkle salt, pepper and a little lemon juice on top.  Roll the spear up in the bread.  Yummier than you think.  These were everyones favorites.  You can also tie a ribbon of chives around the roll in a bow to make it fancy.


Strawberry Shortcake
 
6 oz of butter (room temp.)
1/4 cup plus two tblsp of sugar
3 eggs
1 1/2 cups of self rising flour
Straw Berry Jam
Strawberries hulled and cut into quarters
 
Whipped cream
(make your own with whipping cream, powdered sugar (add to taste) and a dash of cream of tartar.  Whip until soft peaks form.  Do not over whip!)
 
For the cake:  Preheat oven to 350 degrees.  Beat together butter and sugar in a large owl until pale and fluffy.  Beat in eggs one at a time.  Sift the flour into the mixture and fold in until thoroughly combined.
 
You can bake in an 8 inch pan (grease and base line with parchment) or into self standing paper baking cups.  Bake at 350 degrees for 20 to 25 minutes until golden brown and cake springs back lightly when touched.  Let cool completely.
 
Spread jam on top of cake.  For cup cakes use a melon baller to scoop out a small space in the center of each cake and fill with a dollop of jam.  Top cake with strawberries.  Put whipped cream in a cake decorators bag with large tip and cover top with whipped cream.  Add extra strawberries on top.  Do the same for each cup cake.  Put a couple of strawberry quarters on top of jam.  Give a nice squeeze of whipped cream on top.  Then put a quarter of a strawberry on top.  Sprigs of mint from the garden give it a nice garnish.  You can bake two cakes and make the cake a double layer if you wish with strawberries, jam and whipped cream between the layers as well as on top.


Peanut Butter Balls
 
2 cups creamy peanut butter
1/4 cup butter room temp.
1/4 tsp salt
1/2 tsp vanilla extract
2 cups confections sugar
Candy chocolate for dipping
 
Mix everything together thoroughly except the chocolate.  Put mixture in fridge and let cool.  Melt chocolate.  Roll mixture into balls and dip in chocolate.  Place on wax paper of foil and allow chocolate to harden.  Super yum.  You can also decorate with sugar crystals or splash with a contrasting color chocolate.


Date Balls
 
1 stick of butter
3/4 cup of sugar
1 pack or 8 oz. of chopped sugared dates
1 cup chopped pecans
1 cup crisped rice cereal
1 tsp. vanilla
Powdered Sugar for coating
 
In saucepan melt butter and sugar over low heat.  Add dates and cook 3 minutes and remove from heat.  Add vanilla and stir.  Add nuts and rice cereal.  Let cool a moment.  Hint:  butter hands to keep hot mixture from sticking to hands.  Roll into balls then roll in powdered sugar.  So yum.


Lemon Sour Cream Pound Cake
 
3 cups flour
1/2 teaspoon baking soda
1/2 teaspoon salt
1 cup (2 sticks) butter room temp
1/4 cup fresh lemon juice
1 tablespoon grated lemon peel
1 cup sour cream
 
Preheat oven to 325 degrees.  Grease 16 cup tube pan.  Dust with flour.
 
Sift flour,  baking soda and salt into a medium bowl.  Beat butter in large bowl at medium speed until fluffy.  Gradually add sugar and beat 5 minutes.  Add eggs 1 at a time beating just until combined.  Beat in lemon juice and peel.  Using spatula mix in dry ingredients.  Mix in sour cream.  Transfer batter to prepared pan.
 
Bake cake until tester inserted near center comes out clean.  About 1 hour 30 minutes.  Let cool completely then turn out onto platter.  You can make a glaze with powdered sugar, lemon juice and vanilla.
 

Praline Brie
 
1 1/2 cup brown sugar
1 stick of butter
2 tblsp of whipping cream
1 cup chopped pecans
1 small or medium round of brie
1 pack of freezer puff pastry (should have 2 sheets)
extra butter
1 egg
 
On a greased piece of foil on a baking pan (foil makes it easier to remove cooked brie later), score top of brie with knife.  Put several pats of butter on top.  Place brie on first sheet of puff pastry.  Place second sheet on top.  Cut away extra on top so that 2nd sheet just covers top.  Put aside scraps.  Bring up first sheet of pastry and bunch around edges to create a pleasing effect and completely cover brie.  Brush top with egg (not necessary but makes it shiny)  Bake in oven at 400 degrees until puff pastry is golden and done (about 20 to 25 minutes). 
 
About 10 minutes after brie is cooking, combine sugar, butter and pecans in pan.  Cook on low until sugar is completely dissolved.  Cook for a couple of minutes longer.  Add whipping cream cook a minute longer.  Slide cooked brie off of foil on to platter.  Pour praline sauce over brie.
 
This is best very fresh so serve immediately.
 
 
Date Scones
 
2 cups all-purpose flour
1tblsp baking powder
2 tblsp sugar
1/4 tsp salt
6 tbs butter
1/2 cup of sugared chopped dates
1 1/4 cup heavy whipping cream
egg for brushing top
large sugar crystals
 
Preheat oven 400 degrees.  I bake my scones on a silpat mat (love that thing worth purchasing).  In a large bowl, whisk together the flour, sugar, baking power and salt,  Cut the cold butter into small pieces and blend into the flour mixture with a pastry blender or your finger tips (I use fingers).  The mixture should look like coarse crumbs.  Add sugared dates.  Add whipping cream to the mixture.  Stir until just combined.  Do not over combine.  Add more cream to make it loose if needed.
 
Spoon mixture onto floured surface.  Knead dough gently (count to 10 DO NOT OVER KNEAD WILL MAKE TOUGH)  Pat into rectangular shape about 2 inches thick.  Cut in half long ways then into triangles.  Brush top with egg, sprinkle with sugar crystals.  Bake 15 to 20 minutes until lightly browned.
 
 
Cream for Scones
 
3 cups heavy whipping cream
1 cup powdered sugar
3 oz cream cheese
dash of cream of tartar
 
Beat cream cheese til smooth.  Set a side.  Use a chilled bowl.  Add heavy whipping cream and beat for 3 to 4 minutes (or more) until it starts to thicken a little.  Then add cream cheese slowly as you beat and add powder sugar and cream of tartar gradually.  Keep whipping until it thickens into soft peaks.  Do not over beat.
 
 
Lemon Curd
 
3 large eggs
1/3 cup fresh lemon juice
3/4 cup sugar
1 tblsp lemon zest
4 tblsp butter cut into small pieces
 
In pan on top of a  heat diffuser  (you can use a bowl placed in a pan with a couple of inches of water instead.)  Whisk together the eggs, sugar and lemon juice until blended.  Cook (on medium) stirring constantly to prevent curdling until the mixture becomes thick like sour cream or hollandaise sauce.  Will take about 10 minutes.  Remove from heat and pour through a fine sieve to remove any lumps.  Stir in butter until melted and thoroughly mixed.  Stir in lemon zest.  Zest is optional.  Cover so skin doesn't form.  Let cool and refrigerate.  Will keep up to two weeks.  Makes 1 1/2 cups.
 
This isn't every recipe and I may have typed in a mistake in my hurry.  So let me know if you would like another recipe or have any questions regarding these recipes.

Monday, December 17, 2012

Getting Ready For Christmas & Around The House and Gardens & Red Beans and Rice Recipe

Long Title = Long Post

I'm finished shopping and now I'm doing a little decorating. Getting ready for a tea I'm having this Saturday for the ladies and girls in my family. It's exciting.   I'm reusing my decorations from past years and adding in a few natural items such as feathers and pine cones along with a generous sprinkling of glitter.  When in doubt...add glitter!  I painted "Merry Christmas" on the mirror with a little acrylic paint.  I'm sure it'll scrape off just fine with a razor blade. 

The mirror is actually an old dresser mirror I saved from a friend who was throwing it out for his mother.  I turned it sideways and painted white first.  When I tired of that I gave it a refreshing coat of glittery gold copper paint!

I also plan on making some fun things for the tea...will post on those later as well.
I love my Carruth Studios Nativity Stone....as well as my lovely handmade angels.   We had so much fun making them in Sunday School.  I teach the 10, 11 and 12 year olds.  My favorite group to teach!  So my Nativity has it's very own host of heavenly beings!
I draped one of my roosters lovely tail feathers over the top to frame it softly!  Just like a loving hug...Sigh....
Hee Hee....Looks as if one angel is in trouble!
My cat and my dog pooped out on me while wrapping presents.  Flossie made herself comfy on top of one of the wrapped gifts.  Delta is comfortable as long as the cat's sleeping!
I've been picking so much from the garden.  The row of red beans I planted (you may remember) way back is picked and shelled.  I was concerned that it may not have time to finish before the coldest weather hit.  We've had a few nights below 40 but the beans and the tomatoes held on!  The largest plumpest ones I put in the white colander.  The ones that started to dry I put in the silver.  I'm going to cook the plump ones.  They are amazing.  So much better than dried and dried's pretty good.

I'm also harvesting: carrots, cauliflower, cabbage, beets, collards, turnips, mustard, Lima bean, broccoli....hmmm...oh yes cilantro, green onion, Roselle, dill, rosemary....that's about it right now.

I'm planting additional kale, cabbage,  and broccoli (transplants), and beets and lettuce (seed) right now.
I spread the remaining beans on a pan to dry.
Pretty.  Very pretty.  I love to feel them.
The plump ones I cooked in a crock pot....since I'd be out shopping all day....Yum
Red Beans
 
(I cook from sight so these are all approximates)
Onions (about 1/2 cup)
Garlic (about 3 to 4 cloves)
Bell Peppers  (about 1/2 cup)
Celery (about 1/2 cup)
Green Onions (about 2)
small bunch of parsley
Salt to taste
Pepper to taste
Dried Red Pepper (I use the ones I grow)
Oil (I use olive)
Red Beans (3/4 to 1 lb)
Smoked Sausage
 
Chop up all the seasonings.  Saute seasonings in oil until tender.  Add to pot with beans and water (or stock).  Cover the beans about 1 inch.  If cooking on the stove you may have to add water or stock as needed.  Salt and pepper and crumble in dried red pepper (or flakes or ground).  Cut sausage into links fry a little while in the pan.  Add to pot of beans and simmer beans until done.  They should be creamy!  Serve over rice.  I like medium grain brown rice or short grain will do too.
 
Some people put a stick of butter in their beans.  They claim it makes them creamy.  Not sure on this.  I'm not inclined to try it personally.  You can also throw in tasso, ham, a ham bone (whenever we have a whole ham I always save the bone for red beans), salt pork...hmmm I'm sure there is something else I've missed that some of the elders do.  They throw most everything in there.
 
If you have a variation I'd love to know!
 
Here's a picture my daughter took of me holding a cabbage and some carrots I grew.  She thought the cabbage looked like a wedding bouquet.  Lovely hand hmmm?

Roasted beets and carrots with olive oil, rosemary, thyme, salt, cracked pepper, and balsamic vinegar.  I boiled the carrots and beets first (separately) to make them tender.  Yum.

Tuesday, December 11, 2012

Alela Diane

I love Alela Diane's Voice and Music. So pretty and soothing.   

Thursday, December 6, 2012

Quilting and How To Make a Pinwheel Square

Inspiration...This mag inspired me...first my Sister Ginger bought this magazine....I wanted it...She refused to relinquish it...so I had to go buy my own. I love the quilt on the front.  It's not so perfect, and  I love that!

I'm not a fan of those matchy matchy quilts that are all even and perfect. They make me feel...well...uncomfortable. Like being in a living room where everything matches...and you know...where no one ever goes.

Well there isn't a room like that in my house. Never will there be.  We use every inch in our house.  I like quilts like that.  Not a hang on the wall quilt...A snuggle under quilt is better.
So I'm attempting to make a similar quilt using scraps from some sewing projects.
You make the whole square from 2 inch strips of fabric.  Starting with 2" X 2" squares and going out from there until you form a roughly 12 1/2" X 12 1/2" Square.  I iron each seam after sewing.  Hopefully that will help make it look nice.  I don't know,  somewhere I heard ironing is the key to good sewing.  Sooo....I've been ironing ever since.  At least my seams.  As anyone who knows me... knows I hate to iron.  My husband just forced me to buy a full sized ironing board.  I've been using a little traveling one forever.  I'm kinda glad he did....don't tell him!
Looka how sweet!
I do like this look.  The colors are fun and unpredictable.  Makes you wanna stare.

Started the next one!  Here you can see the layout of a square before it's sewn.
This is a not so good pin wheel square.  I like this one too.  It's really easy.  I'll show you how.
Cut out four squares.  These are about 4".  I just stack the fabric up and use a template and rotary cutter.  Just discovered these rotary cutters and I like them a lot.  You can cut out four squares lickity split.
Yep...there they are.  Four lovely squares.  I like using unexpected fabrics and colors together.
Put two squares top side facing one another and draw a line diagonally down the center.
Sew a seam on each side (not on the line) of the line.
Then cut along the line to divide the squares in half and into triangles.
Iron them flat this way.....
Then iron them open.  It will form four squares of two fabrics each.  Assemble in the pattern you want...
 Sew two squares facing each other together...iron flat.  Sew the other two squares facing each other together...iron flat....(Is this confusing?)  Then sew the two pieces together facing each other...iron flat.  It's really easy once ya get it....and fast (Which I like).
The second one turned out much better I must say.  Not content to start one quilt...I started two.  Not smart.  Now I'll have to finish them......smiles and smiles!